7 Dec 2016

A few years ago, C made us a punching cradle out of wood recovered from a fruit crate. This tool helps you punch the holes through the fold of the paper with more precision, since you just lay the open signatures inside it an punch downwards with the awl. It has been a big help in our bookbinding adventures, it is very sturdy and doesn’t take a lot of storage space. Recently I decided that I needed to have more to be used in our bookbinding workshops. Even though the cradle is only 16 cm long, I have used it for punching books of up to A5 size without problems. Now that I have several, I can imagine placing two side by side to make books up to A3 size! I also came across a bigger veggie crate that provided me with 20 cm pieces!

These boxes are pure (cheap and wooden) gold.
I decided to take a few pictures of the process, and do a little write-up on how to make the cradle. It is so easy, I didn’t take as many pictures of the process as I should have! I hope it is clear enough like this.
SUPPLIES:
- 2 wood wedges from the corners of a fruit/veggie crate (see pictures),
- 3 small pieces of balsa wood/thin plywood (aproximately 6 cm x 3 cm x 4 mm), for example from the sides or bottom of the crate,
- wood glue or strong craft glue.

TOOLS:
- pencil (or just use the cutter to mark the wood),
- ruler,
- cutter knife,
- small flat screwdriver (that you don’t mind possibly damaging a bit),
- pliers,
- sandpaper,
- scrap paper (to protect table surface from glue).
PROCEDURE
- First of all, we have to disassemble the wooden crate to get to the corner pieces we want to use. To do this, just slide the screwdriver under the staples and use the screwdriver as a lever to pull the staples out. There are many of these (my boxes had 14 staples for each corner piece!), but the plywood is really soft and this should be considerably easy. You might need to pull them out with the plyers.Wear gloves if you want to avoid accidentaly scratching your skin or getting splinters!

i. This is the corner wedge piece we need. ii. Using the screwdriver as a lever to remove the staples.
- If the surface of the pieces we recovered is rougher than we would like, now is the moment to smooth them out a bit with sandpaper.
- From the two wedge shaped corner pieces, choose the long sides that are straighter and place them side by side, leaving a 1.5-2 mm gap between them. This is almost how your cradle will look once it’s finished, so you can use the finished pictures as reference (sorry I didn’t take a picture of this step!).
- Now take some measurements. The width (W) of the cradle, as we laid it in the previous step, and the height (H) of it. Keep in mind that if you are reusing materials, it is possible that the measurements are not regular, and for example the height is not equal at both ends. In this case, just do an appoximation. This is not a rocket we are building!
- Cut three pieces of plywood: one back piece that is W by H plus the thickness (T) of the plywood, and two bottom pieces that are as long as your W and 1 or 2 cm wide. The cutter knife should be enough to cut through the plywood.

i. Diagram of the parts and measurements mentioned. ii. Starting the gluing.
- Place the two bottom pieces on your table. Put some glue on them, avoiding the center, which will remain uncovered. Now place the two long wedge pieces in place on top of them and adjust their position so the bottom pieces are on the ends and there is a regular 1.5 – 2 mm gap between their long edges. Luckily, wood and craft glue stay wet for some minutes so you can readjust their position until you are satisfied. Make sure the edges are flush on one end, where we will glue the back piece.
- Let it dry a bit before putting some glue on that end and place the back piece there. Put the cradle down on the table to make sure it sits flat. The back piece goes only on one side so that we can use bigger signatures than the cradle can hold, letting the paper go over the other end.
- Wait for it to dry and it’s ready to use!

To use your punching cradle, remember to always align your signatures against the back piece, so that the holes will be completely regular.
I think the design could be improved with a wooden punching guide, but so far it has worked really well for me! Please tell me if you make one and how it works for you, I’d especially like to know how it compares to other models since this is the only one I’ve ever used.
PS: Please, feel free to point out where my instructions might not be completely clear. Writing a tutorial is much more difficult than I expected!
filed in
Tutorial · tagged bookbinder tools, diy, wood
11 Jan 2016
There is a charm, a magic about agendas that I can’t really explain. In my schooldays, I remember how special the day was when I went to the book store to get my textbooks and also choose an agenda for the next school year. I would spend so much time looking at all the available ones carefully, the cover, the size, the design… It was a difficult choice but very enjoyable, and I loved using them month after month.
With time, though, as my life follows no schedule and I have little to organize, my agendas would growingly end up empty, unused, sad. So, even though I still browse through them when they appear in the stores by the end of the year, I don’t let myself buy any, because it just makes me sad to keep them blank.
But I discovered something: I can revisit some of that magic in the action of bringing an agenda to life.
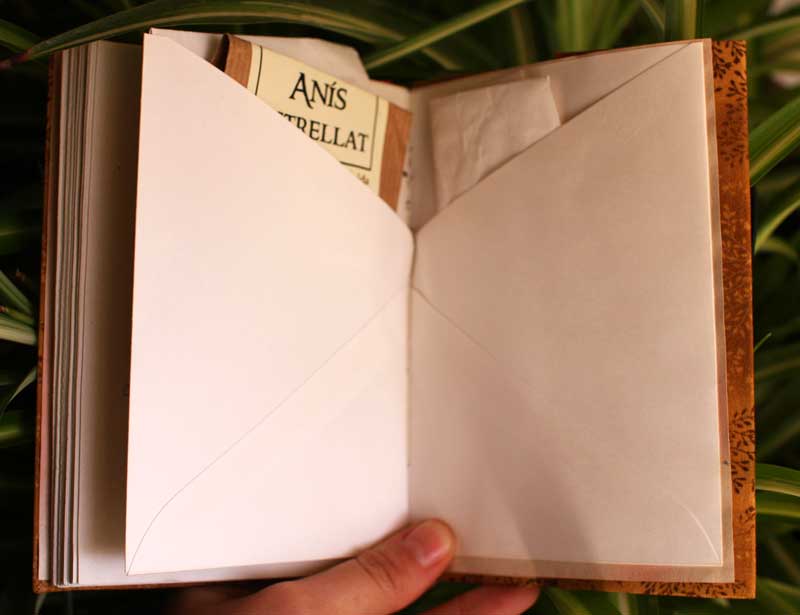
These pockets are an envelope divided in two by the binding.
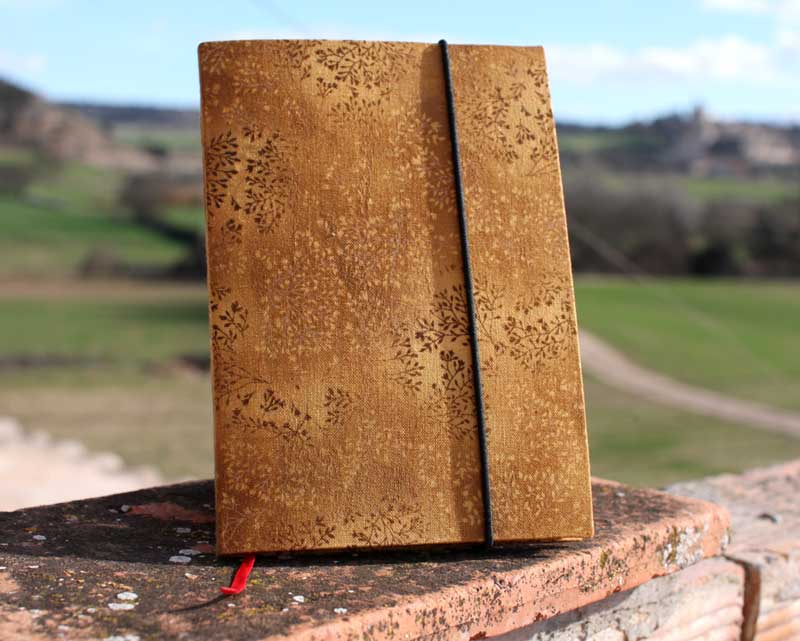
So I ended last year and started 2016 immersed in this process. I designed how the week would look, printed each page in my home printer, manually feeding the pages one by one to print the back sides. I found a nice fabric in a small shop for the cover, and with some paper that I decorated as a craft in my childhood -yellowed with the years- as endpapers, some fun details like back pockets, a bookmark, made with a ribbon I found on the street, and an elastic closure, I am very happy with the overall result, and as always I hope it is durable enough for intensive use.
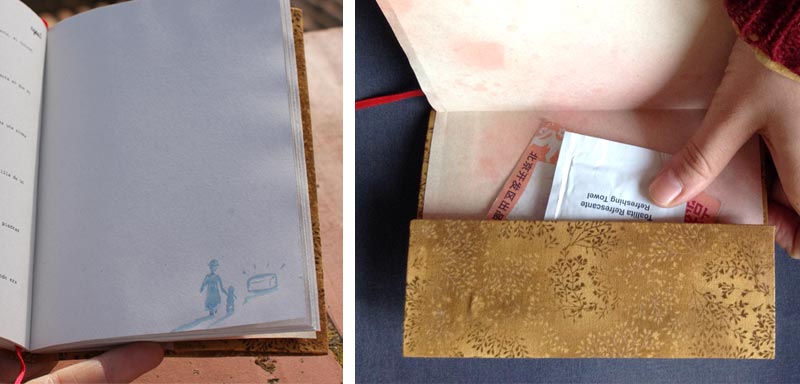
One of the illustrations… Anybody recognize the scene? And the back pocket.
And there is something else: as I was working on the page design, I was testing the use of typographical symbols as a separation line between the weekdays… But I had a better idea: couldn’t it be actual text, in small print, forming a visual line, as a separation, yet at the same time adding a bit of extra content? From here on it evolved into the idea of using the beginnings of books and texts, some classics, some books I really like, some poems, that would in fact become a riddle for each week: what book is it? Would it be easy to guess? And if not, it would become a book recommendation. On the opposite page I included illustrations related to each of the texts.

This one is in several languages: catalan, spanish, english, french and italian. I am playing with the idea, though, to make a version in a more accessible mix of languages or in just one, and see if anybody would like to have one.
I must say I had a lot of fun doing it, I hope it’s also fun to use!
filed in
Books · tagged agenda, paperback, sitched and glued, upcycle
24 Feb 2014

This year, between moving and travelling, we haven’t made any big edition of agendas like last year, and just a couple of monthly planners for those who were happier with the ones from 2013.
For a present, though, we made this unique agenda, in which each page has been individually hand painted and which also has an embroidered cover.

View of the cover and the back
We used recycled paper and photocopied it using an old machine, the cover is made with used cardstock, threads and a piece of a broken cardigan. When we put a few not so interesting things together, it’s amazing what kind of results we can get. Don’t you think?

1. Sample inside page 2. Detail of the elastic attachment 3. Inside pocket 4. View from top
filed in
Books · tagged agenda, embroidery, upcycling
1 Apr 2013

Yes, Edicions Cotton Flower is pretty much alive, just maybe hibernating after the agenda hangover. This is our last creation: a photo album (blank) with a 3-D fabric pinwheel on the cover! I’m especially happy with the colour combination. And see, I can go beyond blue and brown!
I sewed the cover with different fabric scraps, the pages are Canson 180 g/m2 cardstock (from the shop) and the album is held together with black linen thread using a binding called coptic, you can recognise it because the spine remains uncovered and the stitches form chains along it.
This kind of binding is very appropriate for albums and scrapbooks because they can be filled with pictures, papers, and such, without the book bulging too much like with most bindings. This is the first time we’ve try this bookbinding technique, and even though it is not perfect, we are quite happy with it and will attempt it again!

The pinwheel on the cover is a quilting block I adapted (the original didn’t have as many colors, but it had a much better finish!).
filed in
Books · tagged àlbum, copte, coptic, hardcover, stitched
15 Jan 2013

We’ve been a little busy during the year change season trying to get the more than 25 agendas we’d been commissioned to ready! Here’s to hoping they’ll help their now owners organize themselves :)
Above and below these lines there are images of the agenda that The Kruch designed and that he sells online in his Etsy store. It’s been good practice to bind for the first time a considerable series of books with content in them, of which we only had the experience of a single copy of a novel for its author. The fact that we print such small editions and we have to depend on printers over which we have no control whatsoever makes printing irregularities the norm, something we are not completely pleased about. But, what can you do! The results are nevertheless quite satisfactory and their recipients seem to be happy about them!

We also did a small edition of a 2013 version of the monthly view planner (we only have one page of the portuguese tiles’ calendar left!) and we designed our own weekly view planner, based on the earlier’s design, but in black and white for economy.
In all of the agendas most materials are new: the pages are white paper printed digitally in a copy shop… But the inside of the covers is made with cereal box card or something similar and, of course, the monthly planners’ covers are still made with an old calendar.

filed in
Books · tagged agenda, edició, edition, sitched and glued
19 Dec 2012

This journal is a commission that gave us a lot of creative freedom, and throughout the whole process of paper hunting across Barcelona’s paper bins, envisioning the design, stitching it onto fabric, and turning it all into a pretty little book it remains a clear example of the reasons why we decided to get into bookbinding.

i. stitching the cover ii. the book block is ready iii. preparing the book’s casing iv. we added a button
Pages are two colored (two shades of brown) paper from a recycling bin, held together with linen thread; fabrics are offcuts from different sources, stitched with cotton embroidery floss; endpapers are reused envelopes; bookmark and closing tape are silk ribbon and the vintage wood button comes from Z’s grandma’s button box.


filed in
Books · tagged beauty, embroidery, hardcover, notebook, upcycle
29 Sep 2012

I made this one-month-per-page planner per request. I designed, printed and bound the booklet with a picture of portuguese tiles from an old calendar as a cover. It includes the months from october to september of 2012-13 and each month has a different color, each according to the season. It looks pretty good, but what I really hope is that it gets used and is practical!

If you are interested in having a similar (or different) planner made for yourself, please contact us

filed in
Books · tagged agenda, comissions, pamphlet stitch, planner
27 Sep 2012

The first edition of The Kruch‘s first two little “Cuentos de Ben” storybooks and also some blank notebooks with his drawings as covers are finally ready.
As always they’re hand-bound, trimmed and cornered.
They can already be found in his online store!

filed in
Books · tagged collaboration, notebook, pamphlet stitch, storybook
7 Aug 2012

One day recently our friend and illustrator The Kruch came by to pay us a visit. We helped him put together a test print of one of a series of comic stories that he’d created. We also used one of his illustrations to put together a couple of notebooks and we think they turned out quite fine. We are looking forward to more collaborations with him!
The covers and the comic are printed on cardstock and plain A4 office paper was used for the pages of the notebooks. We sewed them with three hole pamphlet stitch and red linen thread.

filed in
Meta · tagged collaboration, notebook, pamphlet